When building a report with navigation links, it’s often a good idea to add a drop-down sub-menu for related views of the current page.
Users are very used to seeing this type of navigation in websites so will know what to do when they see this. It also gives a more fluid user experience.
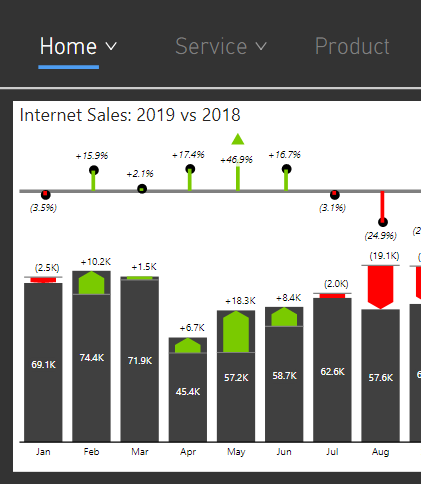
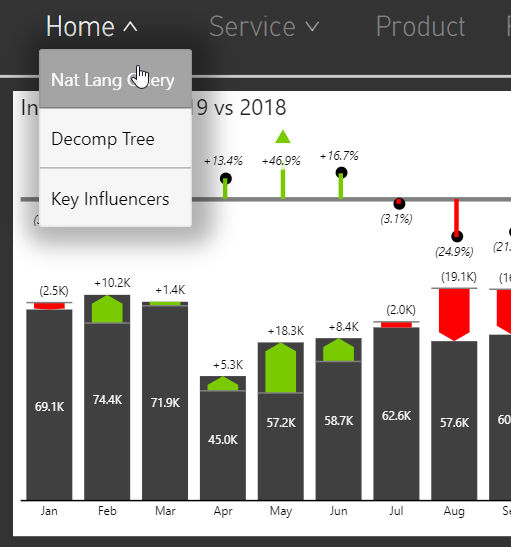
Drop-Down Sub-Menu Unselected
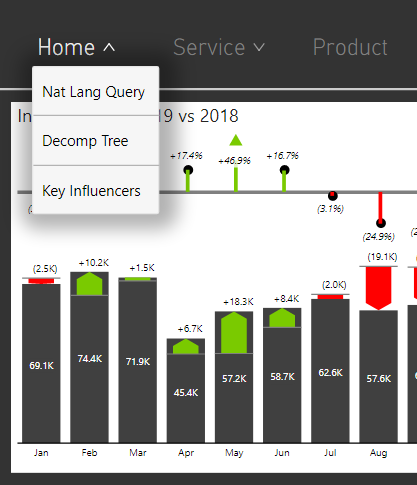
Drop-Down Sub-Menu Selected
Here’s how to set this up, with the use of shapes, buttons and bookmarks.
STEP ONE:
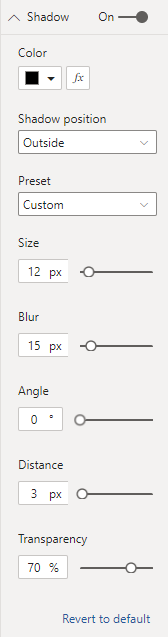
First, add a rectangle shape and set the desired size and background colour. I added a border with the same colour as the background, and set the radius to 2px. Then a shadow was added and the following properties were set. This will give it a nice ‘floating’ effect.
Border Settings
Shadow Settings
Next, add line shapes and rotate to 90 degrees and set the colour to very dark grey/almost black, then align on top of your rectangle. These will be used as the sub-menu item dividing lines.
*note, it’s always advisable to use the Selection pane to make sure you have the Z-order set correctly for all visuals on your report canvas.
You’re now ready to set up the buttons for the navigation items.
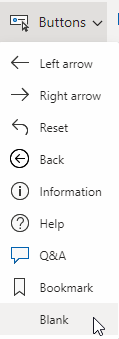
Insert a button and make sure you select the Blank option.
Add the text that you wish to see on the sub-menu item and set up the size to fit the width of the rectangle background.
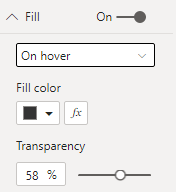
Now set the fill colour for hover mode as per the screenshot below:
This will give a really nice ‘selected’ effect when you hover the mouse over it.
Once you have all of the required buttons set up like this, you’re ready to set up the drop-down activation chevrons. This is achieved by using a combination of lines, buttons and bookmarks.
STEP TWO:
Start this by inserting 4 lines and set the following formatting:
line one and three –Width:30, Height:26, Rotation:160 degrees, Weight:1 pt
line two and four – Width:30, Height:26, Rotation:20 degrees, Weight:1 pt
Now align these to form a chevron and then insert another 2 blank buttons directly on top, and set the width and height to 20, with full transparency. These are going to be used as triggers to activate and deactivate the drop-down sub-menu.
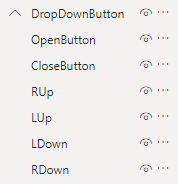
*note, It’s best practice to name your items for easy identification, as well as using groupings with the Selection pane.
STEP THREE:
Adding the bookmarks will now make the sub-menu appear and disappear.
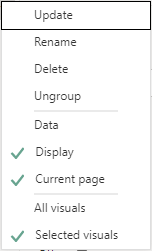
First, we’ll set up the ‘deactivated state’ bookmark. In the Selection pane, select the desired visibility of all of the items within your sub-menu and drop-down chevron buttons. Then with them all still selected, click on Add in the Bookmarks pane and right-click and make sure that Data is unchecked and Selected visuals is selected. Then click Update and rename this bookmark to SubMenuClosed.
Now do exactly the same again but make sure your selected visuals have the reverse visibility set against them. Rename this bookmark to SubMenuOpen.
I hope you agree that this a a really nice way for users to navigate around your reports. Give it a go and let me know in the comments if you’ve tried anything similar, or if you’d do it a different way. Thanks for reading.

I like how you created the chevrons! Good tip that I will use.
Very nice, awesome I was looking for something similar, where can I download this file from. Thanks